> ## Documentation Index
> Fetch the complete documentation index at: https://docs.interchange.io/llms.txt
> Use this file to discover all available pages before exploring further.
# Management UI
> Navigate the Scope3 platform dashboard to manage members, API keys, advertisers, partners, and billing
The Scope3 platform provides a web dashboard at [interchange.io](https://interchange.io) for managing your organization's members, API keys, advertisers, partners, and billing.
## Account Switcher
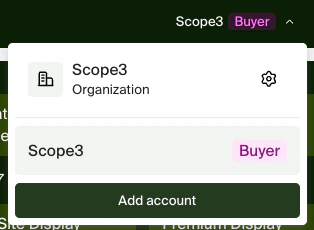
If you belong to multiple accounts (e.g. a Buyer account and a Seller account), use the account switcher in the top-right corner to switch between them or add a new account.
 ***
## Buyer Homepage
After logging in as a **Buyer**, you'll see the buyer homepage with quick-access cards for campaigns, advertisers, API keys, and member management.
***
## Buyer Homepage
After logging in as a **Buyer**, you'll see the buyer homepage with quick-access cards for campaigns, advertisers, API keys, and member management.
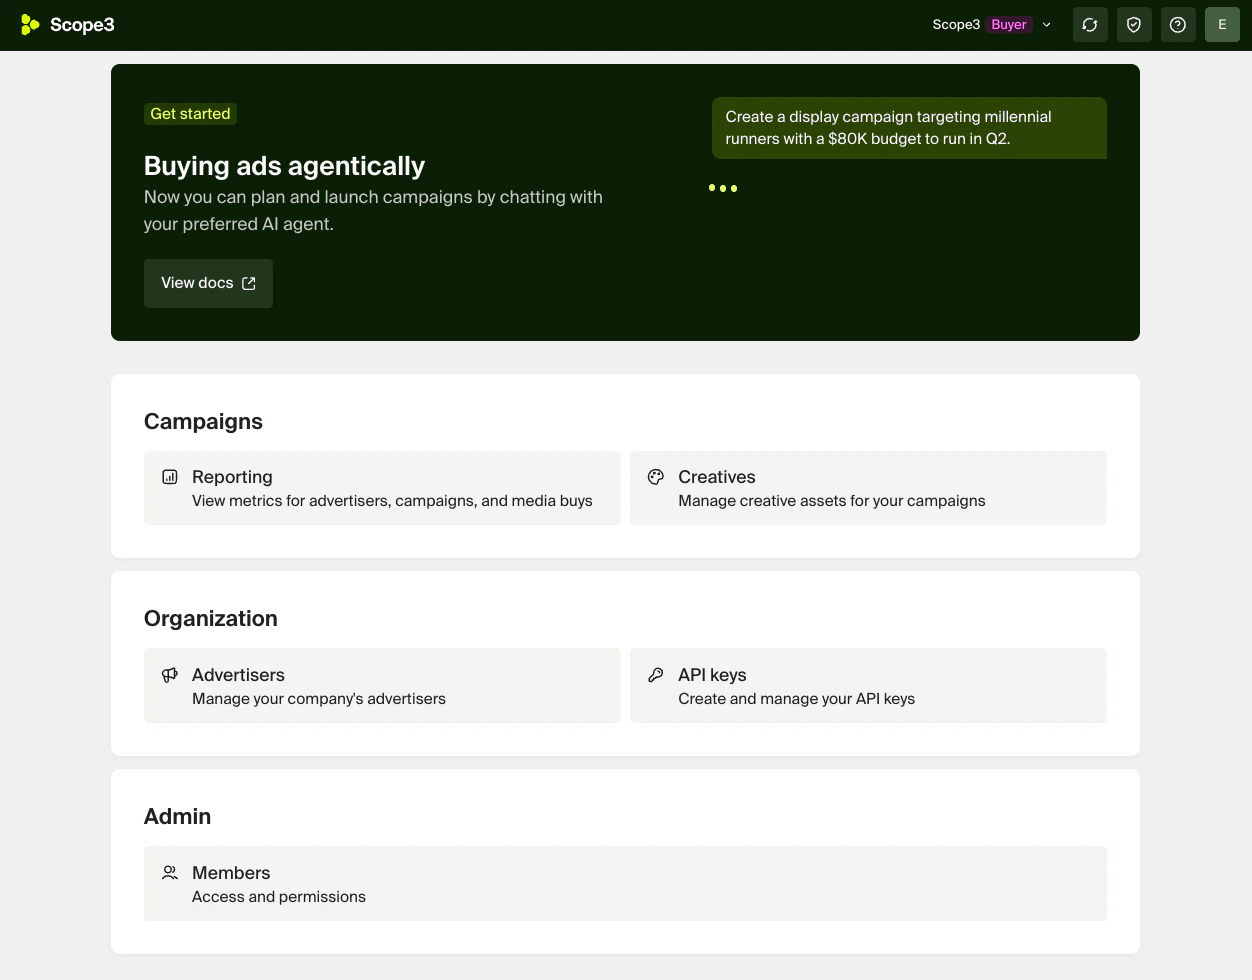 From here you can:
* **Get started** with documentation and quickstart guides
* **View reporting** for campaigns and media buys
* **Manage creatives** for your campaigns
* **Manage advertisers** for your organization
* **Manage API keys** for your integrations
* **Manage members** and permissions
***
## Seller Homepage
After logging in as a **Seller**, you'll see the seller homepage with quick-access cards for your storefront, campaigns, API keys, and member management.
From here you can:
* **Get started** with documentation and quickstart guides
* **View reporting** for campaigns and media buys
* **Manage creatives** for your campaigns
* **Manage advertisers** for your organization
* **Manage API keys** for your integrations
* **Manage members** and permissions
***
## Seller Homepage
After logging in as a **Seller**, you'll see the seller homepage with quick-access cards for your storefront, campaigns, API keys, and member management.
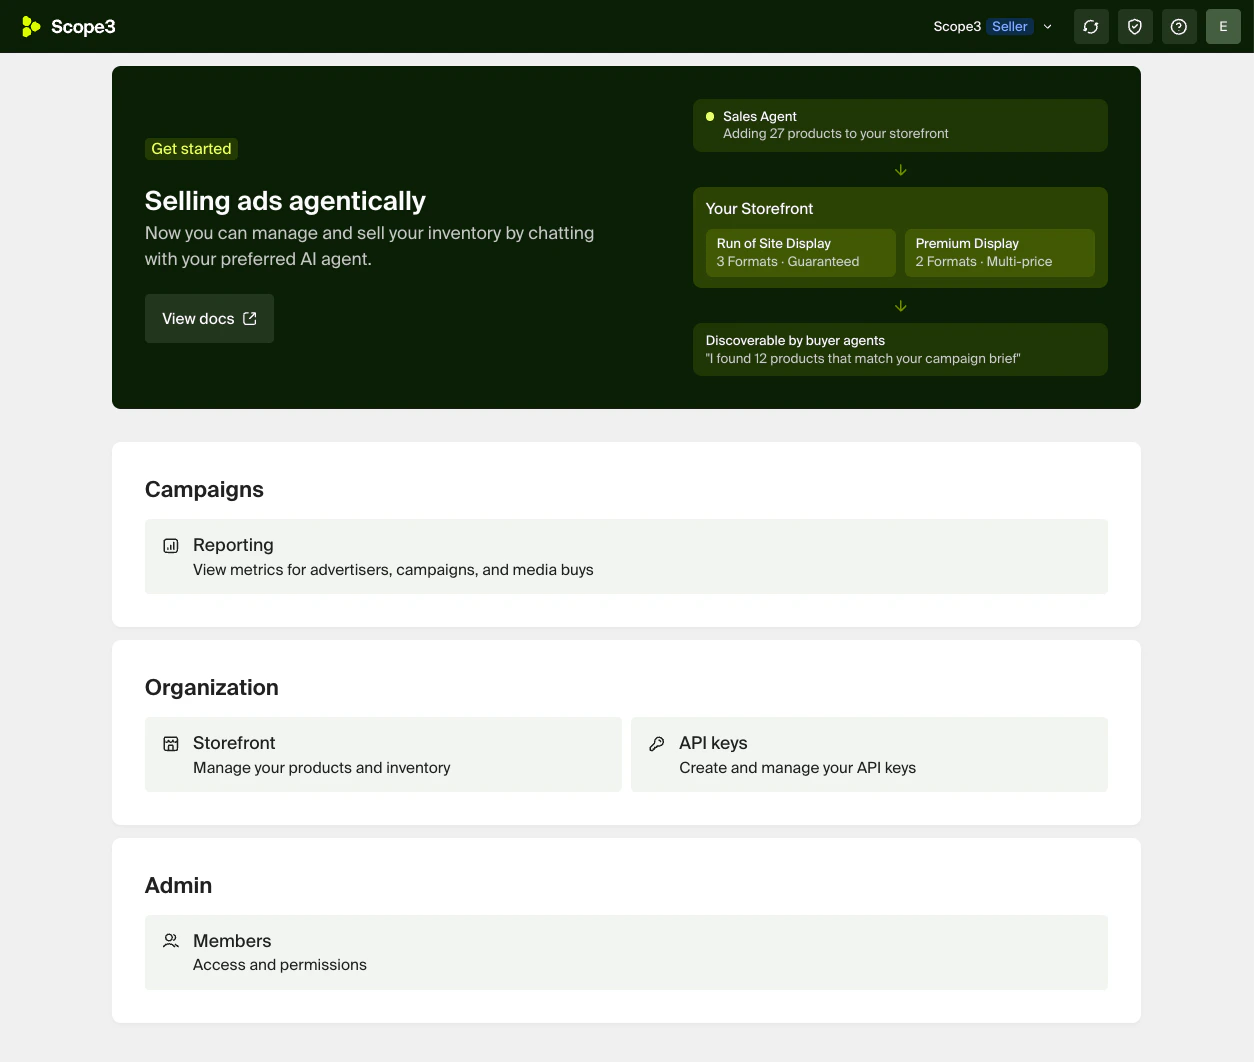 From here you can:
* **Get started** with documentation and quickstart guides
* **View your storefront** and manage products and inventory
* **View reporting** for campaigns and media buys
* **Manage API keys** for your integrations
* **Manage members** and permissions
***
## API Keys
Click **Manage API keys** from the dashboard to view your existing keys.
From here you can:
* **Get started** with documentation and quickstart guides
* **View your storefront** and manage products and inventory
* **View reporting** for campaigns and media buys
* **Manage API keys** for your integrations
* **Manage members** and permissions
***
## API Keys
Click **Manage API keys** from the dashboard to view your existing keys.
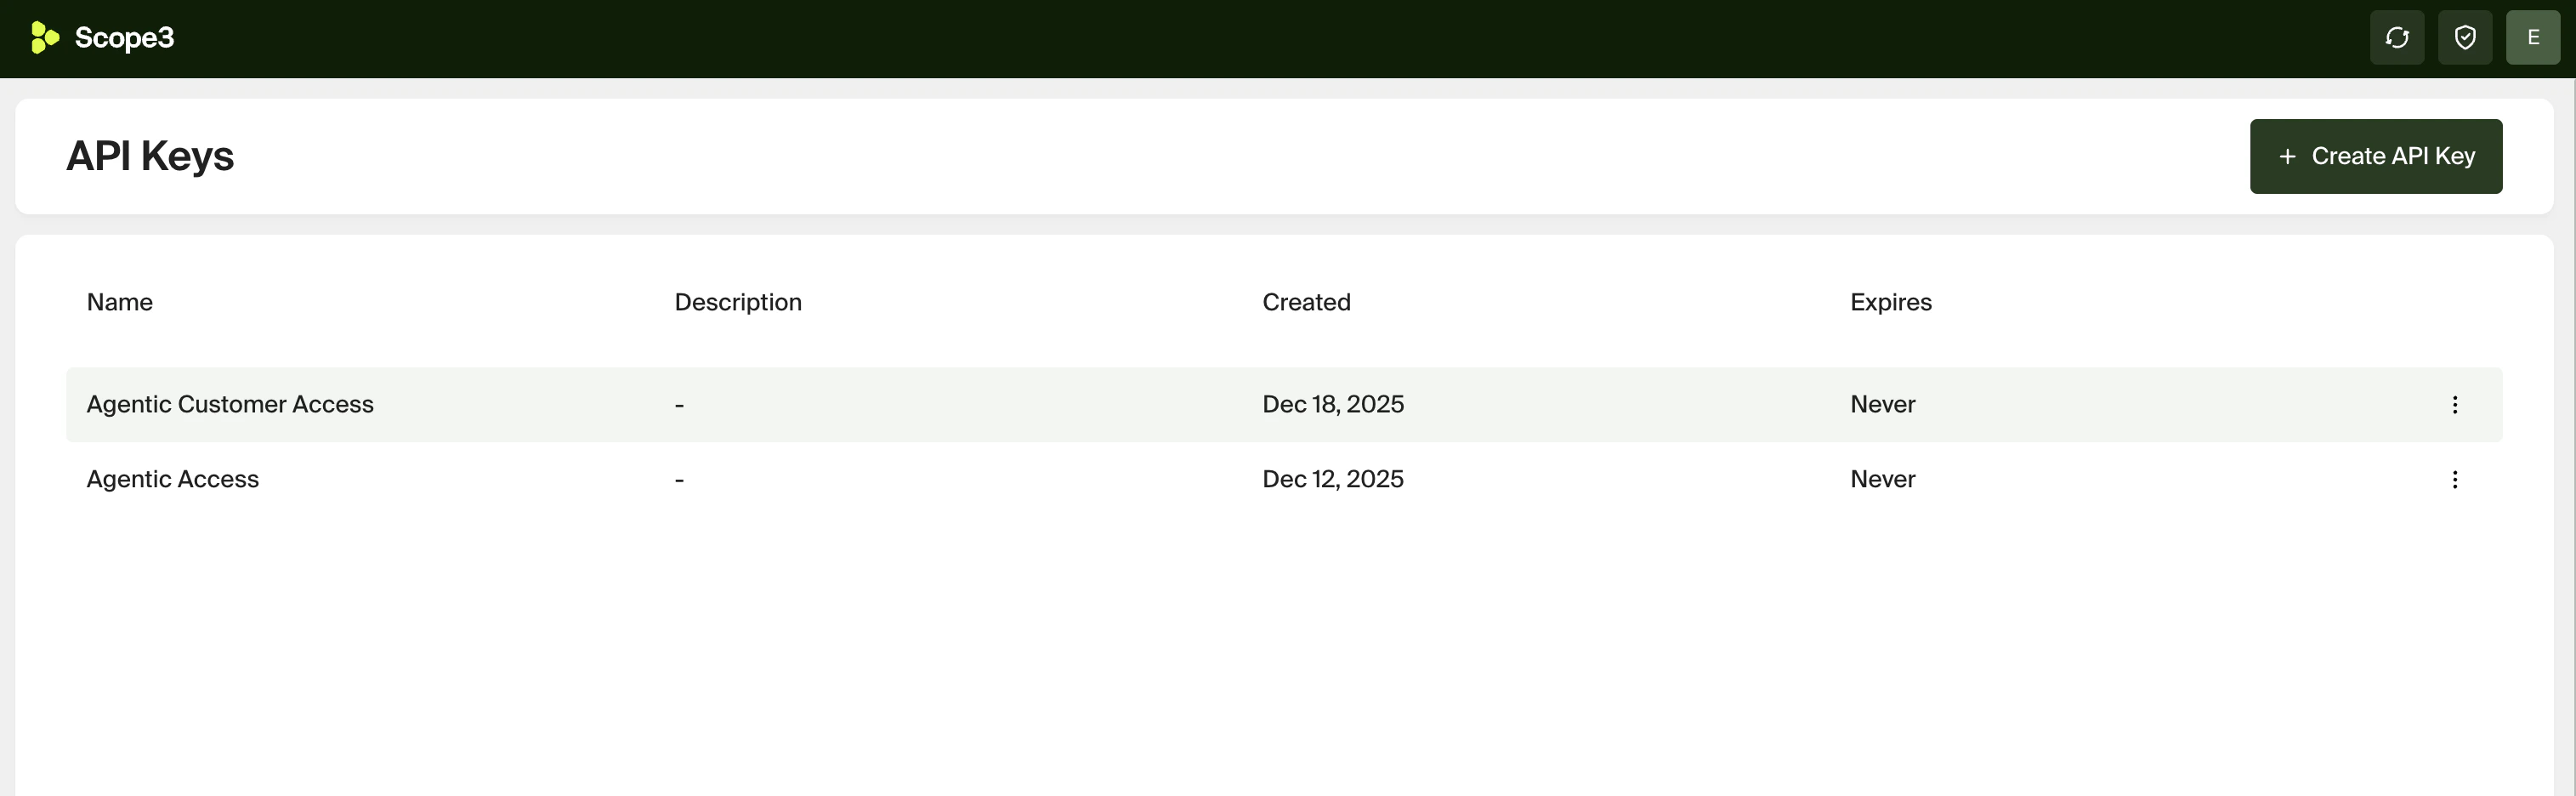 The API keys list shows each key's name, description, creation date, and expiration. Use the three-dot menu on each row to manage individual keys.
### Creating an API Key
Click **+ Create API Key** to open the creation form.
The API keys list shows each key's name, description, creation date, and expiration. Use the three-dot menu on each row to manage individual keys.
### Creating an API Key
Click **+ Create API Key** to open the creation form.
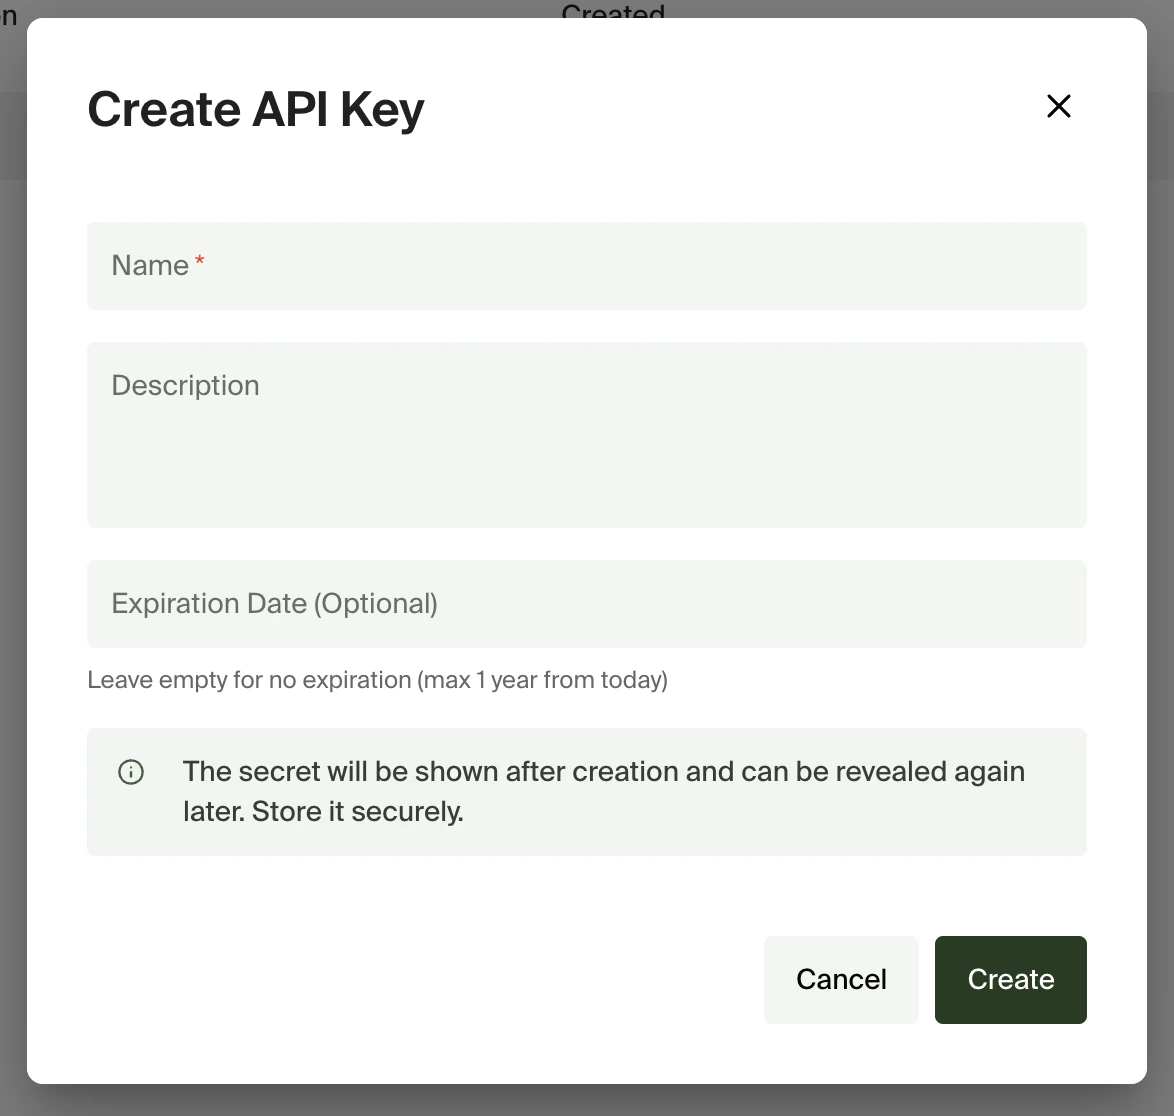 Fill in the following fields:
| Field | Required | Description |
| ------------------- | -------- | --------------------------------------------------------------------------- |
| **Name** | Yes | A descriptive name for the key |
| **Description** | No | Additional context about the key's purpose |
| **Expiration Date** | No | Optional expiry date (max 1 year from today). Leave empty for no expiration |
The API key secret will be shown after creation. Store it securely - you'll need it to authenticate API and MCP requests.
***
## Advertisers
Click **Manage advertisers** from the dashboard to view and manage advertiser accounts.
Fill in the following fields:
| Field | Required | Description |
| ------------------- | -------- | --------------------------------------------------------------------------- |
| **Name** | Yes | A descriptive name for the key |
| **Description** | No | Additional context about the key's purpose |
| **Expiration Date** | No | Optional expiry date (max 1 year from today). Leave empty for no expiration |
The API key secret will be shown after creation. Store it securely - you'll need it to authenticate API and MCP requests.
***
## Advertisers
Click **Manage advertisers** from the dashboard to view and manage advertiser accounts.
 The advertiser list shows each advertiser's name, brand domain, description, status, and creation date. Use the three-dot menu on each row to manage individual advertisers.
### Creating an Advertiser
Click **+ Create advertiser** to open the creation form.
The advertiser list shows each advertiser's name, brand domain, description, status, and creation date. Use the three-dot menu on each row to manage individual advertisers.
### Creating an Advertiser
Click **+ Create advertiser** to open the creation form.
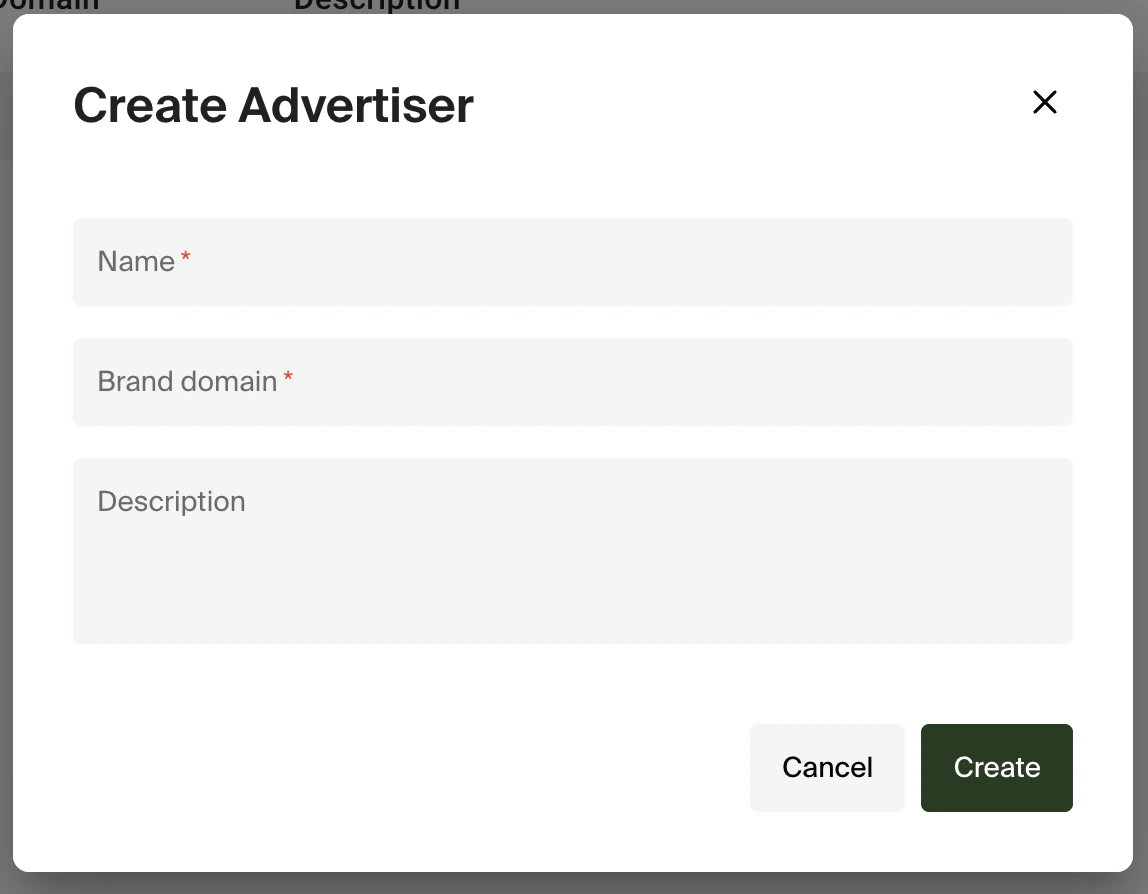 | Field | Required | Description |
| -------------------- | -------- | --------------------------------------------------------------------------------------------------------------------------------------------- |
| **Name** | Yes | The advertiser's name |
| **Brand domain** | Yes | The advertiser's brand domain. Use **Look up brand** to resolve and link the brand from the domain. |
| **Primary currency** | Yes | The currency every campaign under this advertiser spends in. You can change it until the first campaign is created, after which it is locked. |
| **Description** | No | Additional context about the advertiser |
| **Sandbox mode** | No | Routes the advertiser's operations to sandbox accounts — no real platform calls or spend. Cannot be changed after creation. |
#### Adding an advertiser in chat
You can also add an advertiser without leaving the chat: ask Murph (for example, *"add an advertiser called Acme at acme.com"*) or click **+ Add advertiser** on the Advertisers overview. A guided in-chat form opens — pre-filled with anything you already said — capturing the same fields above, resolving the brand for confirmation, and creating the advertiser when you submit. Once it's created you can switch straight into it or add another.
***
## Member Management
Click **Manage members** from the dashboard to view and manage your organization's members.
| Field | Required | Description |
| -------------------- | -------- | --------------------------------------------------------------------------------------------------------------------------------------------- |
| **Name** | Yes | The advertiser's name |
| **Brand domain** | Yes | The advertiser's brand domain. Use **Look up brand** to resolve and link the brand from the domain. |
| **Primary currency** | Yes | The currency every campaign under this advertiser spends in. You can change it until the first campaign is created, after which it is locked. |
| **Description** | No | Additional context about the advertiser |
| **Sandbox mode** | No | Routes the advertiser's operations to sandbox accounts — no real platform calls or spend. Cannot be changed after creation. |
#### Adding an advertiser in chat
You can also add an advertiser without leaving the chat: ask Murph (for example, *"add an advertiser called Acme at acme.com"*) or click **+ Add advertiser** on the Advertisers overview. A guided in-chat form opens — pre-filled with anything you already said — capturing the same fields above, resolving the brand for confirmation, and creating the advertiser when you submit. Once it's created you can switch straight into it or add another.
***
## Member Management
Click **Manage members** from the dashboard to view and manage your organization's members.
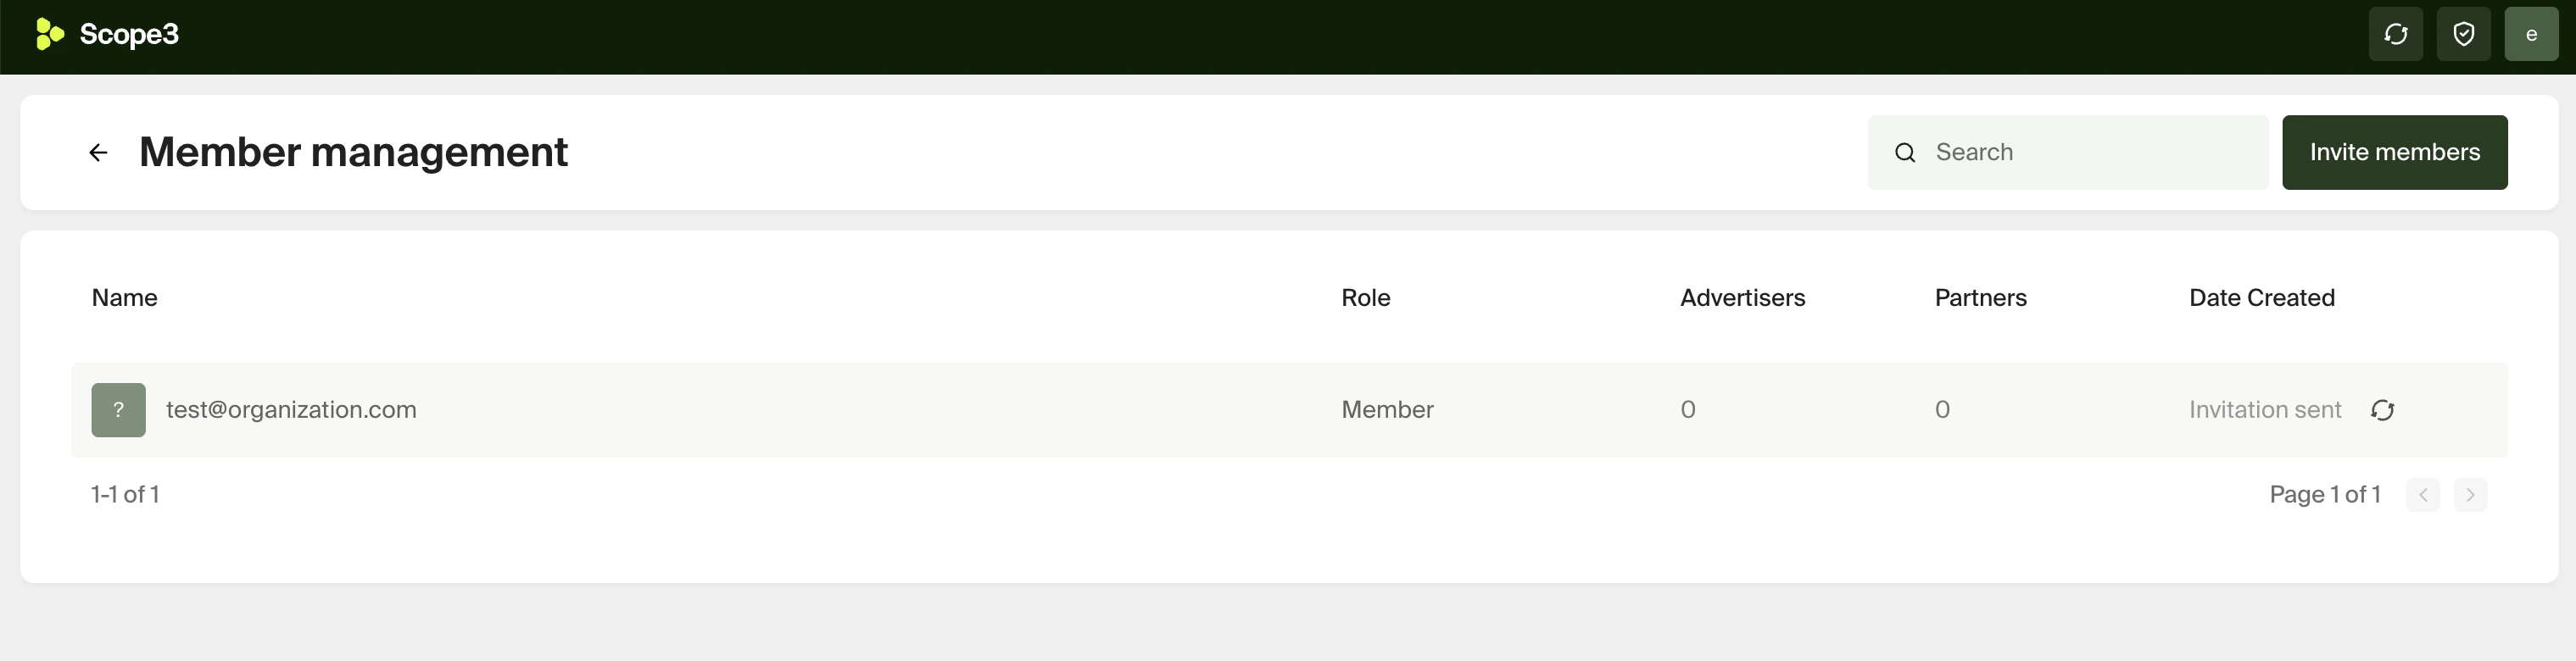 The member list shows each user's name or email, role, number of assigned advertisers and partners, and their status. Pending invitations show as "Invitation sent" in the Date Created column. You can search for members and change their role using the dropdown in the Role column.
### Inviting Members
Click **Invite members** to add new users to your organization.
**Step 1: Enter email and role**
The member list shows each user's name or email, role, number of assigned advertisers and partners, and their status. Pending invitations show as "Invitation sent" in the Date Created column. You can search for members and change their role using the dropdown in the Role column.
### Inviting Members
Click **Invite members** to add new users to your organization.
**Step 1: Enter email and role**
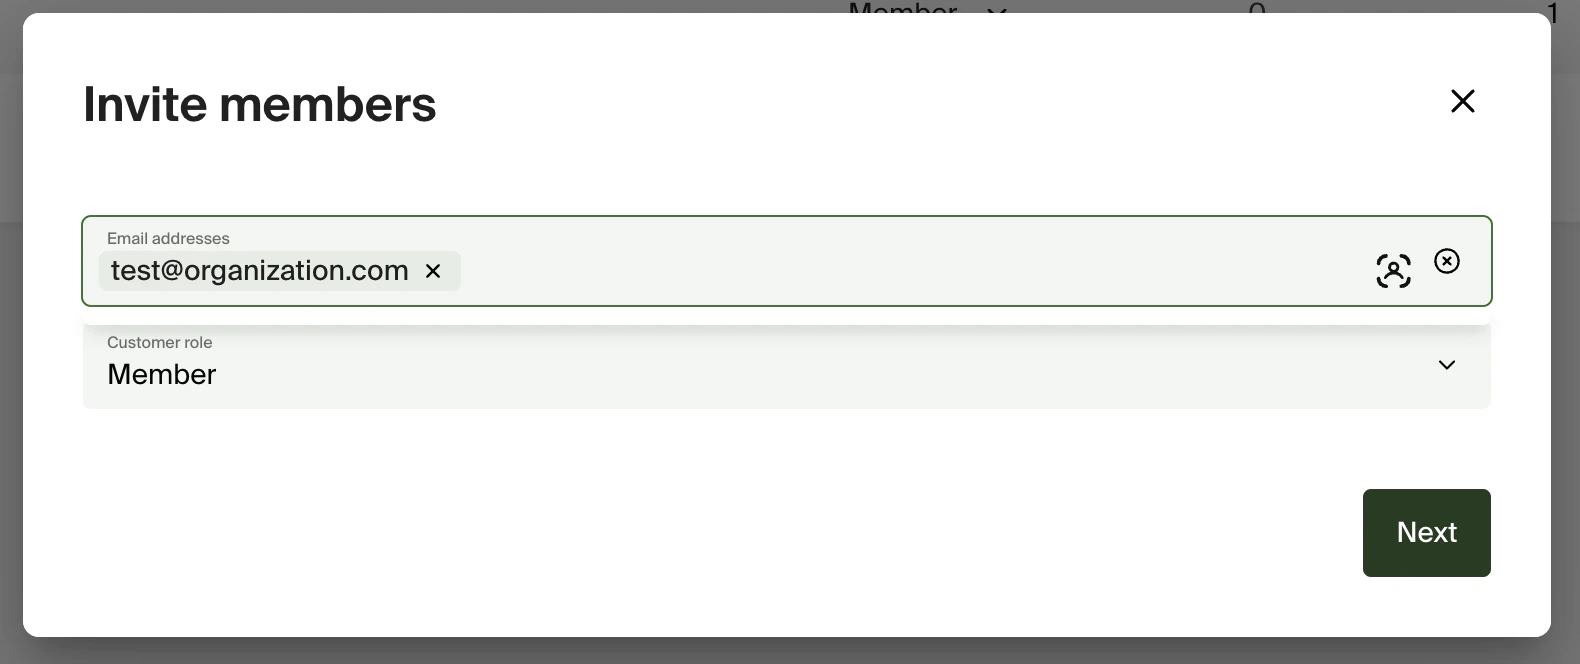 * Enter one or more email addresses
* Select a **Customer role**:
* **Admin** - Full access to all Advertisers and Partners by default. Advertiser selection in the following step is optional.
* **Member** - Limited access. You must assign specific Advertisers and Partners in the next step.
**Step 2: Select access**
* Enter one or more email addresses
* Select a **Customer role**:
* **Admin** - Full access to all Advertisers and Partners by default. Advertiser selection in the following step is optional.
* **Member** - Limited access. You must assign specific Advertisers and Partners in the next step.
**Step 2: Select access**
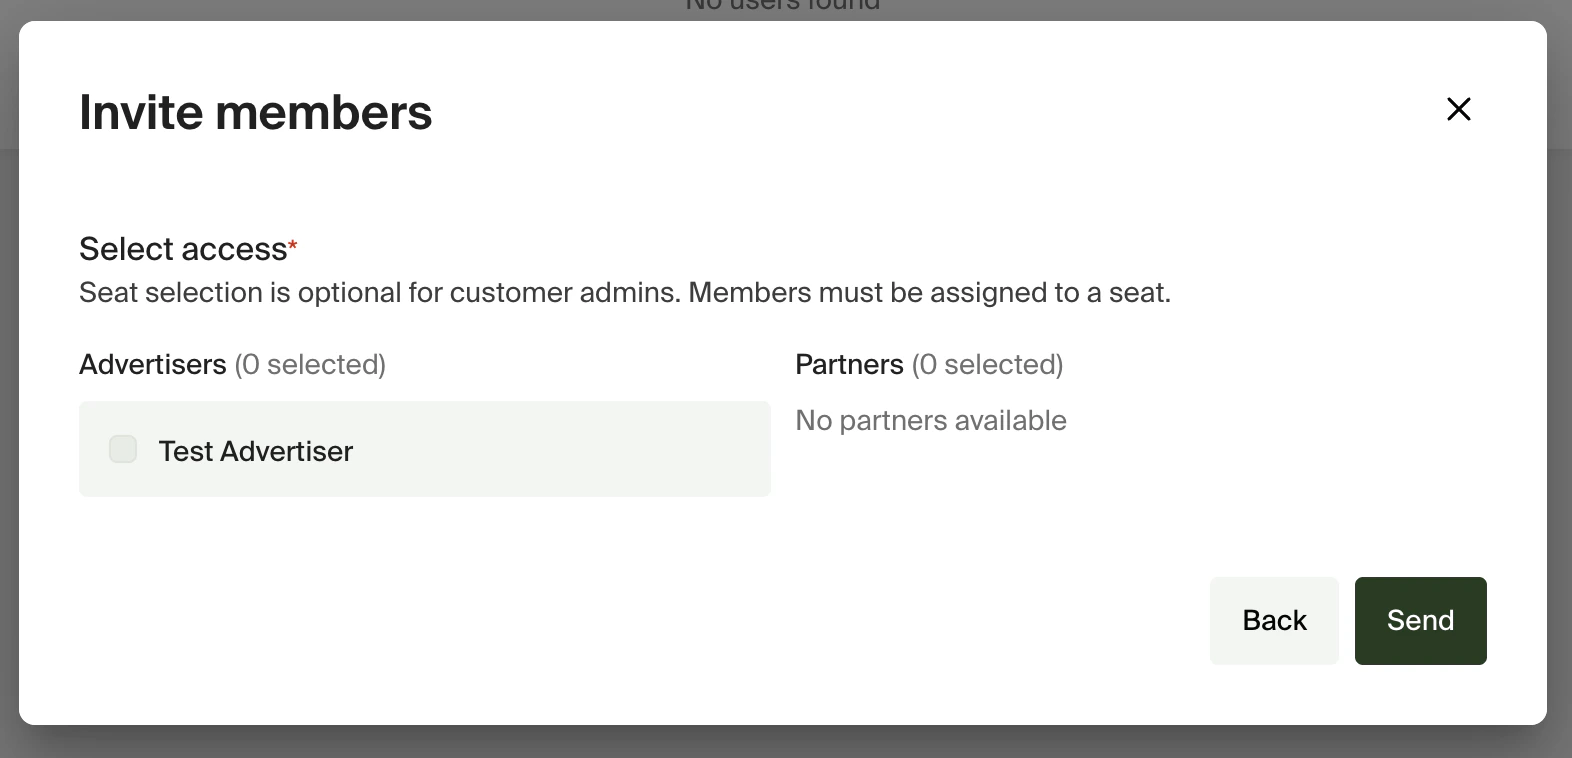 Select which **Advertisers** and **Partners** the new member should have access to. For Admin users this step is optional since they have access to everything by default. Click **Send** to send the invitation.
***
## Next Steps
Learn how to use your API key to authenticate requests
Get started making API calls with your key
Select which **Advertisers** and **Partners** the new member should have access to. For Admin users this step is optional since they have access to everything by default. Click **Send** to send the invitation.
***
## Next Steps
Learn how to use your API key to authenticate requests
Get started making API calls with your key